
Tech
Why the Dewulf Harvester Model D-7146 is Revolutionizing Modern Farming

The Dewulf Harvester Model D-7146 is transforming the way farmers harvest their crops. Built with efficiency in mind, this advanced harvester allows farmers to complete harvesting faster and with less effort, meeting the needs of today’s demanding farming schedules. With the Dewulf D-7146, tasks that once took a long time are now completed quickly, giving farmers more time to focus on other critical farm activities.
The versatility of the Dewulf D-7146 is also impressive—it handles a range of crops, from potatoes to carrots, making it an ideal choice for farmers with diverse fields. Its robust engine and large capacity mean it can haul more crops in one go, reducing trips across the field and saving time. This article will highlight what sets the Dewulf Harvester Model D-7146 apart and why it’s becoming a popular choice among farmers looking to increase efficiency.
What Makes the Dewulf Harvester Model D-7146 Unique
The Dewulf Harvester Model D-7146 combines cutting-edge technology with easy-to-use features, making it perfect for today’s fast-paced farming environment. This machine is designed to simplify the harvesting of various crops, helping farmers save time and energy. Thanks to its powerful motor and generous storage capacity, the D-7146 enables farmers to work quickly, even in large fields.
One standout feature of the Dewulf D-7146 is its adaptability. It works seamlessly with multiple crop types, including potatoes, carrots, and beets, making it a versatile investment for farms with a variety of crops. This flexibility means that farmers don’t need separate equipment for different crops—they can rely on this single harvester to do it all.
Additionally, the Dewulf D-7146 is known for its durability. Built to withstand the rough conditions of farming, this machine requires minimal maintenance and is designed to last. Farmers who choose this model often find it to be a reliable, long-term solution for boosting productivity season after season.
How the Dewulf Harvester Model D-7146 Can Boost Farm Productivity

The Dewulf D-7146 is a game-changer when it comes to enhancing farm productivity. It streamlines the harvesting process, allowing farmers to gather crops more quickly during peak times. With this efficiency, farmers can focus on other essential tasks, knowing that their crops are harvested without delay.
The D-7146’s large storage capacity also reduces the number of trips across the field, allowing farmers to carry more crops per trip and cut down on fuel and time costs. This efficiency not only saves time but also reduces operational expenses, which is crucial for any farm’s profitability.
Ease of use is another feature that sets the Dewulf D-7146 apart. Farmers new to this model can quickly learn its straightforward controls, making it accessible to operators of all experience levels. With less time needed for training, farmers can get the machine up and running immediately, allowing them to maximize productivity from day one.
Key Benefits of Using the Dewulf Harvester Model D-7146
The Dewulf Harvester Model D-7146 brings a host of benefits to any farm. First, it saves valuable time during the harvest season. With its powerful engine and efficient design, this harvester allows farmers to get the job done faster than traditional methods.
Another major advantage is the D-7146’s versatility. It’s suitable for a wide range of crops, including root vegetables and leafy greens, making it a great choice for farms with diverse produce. By using one machine for various types of harvesting, farmers save both money and storage space.
Comfort is also prioritized in the Dewulf D-7146. Its spacious, well-designed cabin provides a comfortable environment for operators, making long hours on the field much more manageable. This comfort factor is particularly helpful during peak harvest times, reducing fatigue and helping operators stay focused on their work.
Maintenance Tips to Keep the Dewulf Harvester Model D-7146 in Peak Condition

To keep the Dewulf D-7146 running smoothly, regular maintenance is essential. Following a few key steps can help ensure the machine stays efficient and lasts for many seasons. A top priority is checking oil levels frequently, which helps the engine run smoothly and reduces wear over time.
Keeping the filters clean is another important step. Clogged filters can lower the harvester’s performance and increase fuel consumption, so regular cleaning is recommended. Belts and hoses also need to be checked regularly, as they play a crucial role in the machine’s functionality. Catching wear and tear early can prevent more serious issues later on.
Essential Maintenance Steps:
- Oil Checks: Maintains engine health and ensures smooth operation.
- Filter Cleaning: Improves airflow and boosts fuel efficiency.
- Belt and Hose Inspections: Prevents breakdowns by identifying wear early.
By following these maintenance practices, farmers can keep their Dewulf D-7146 performing at its best, even during the busiest times. Consistent care not only helps avoid breakdowns but also ensures steady performance year after year.
Conclusion
The Dewulf Harvester Model D-7146 is a fantastic choice for farmers who want a faster, more efficient way to harvest crops. With its strong motor, high storage capacity, and user-friendly design, this harvester makes it easier to manage the demands of the busy harvest season. Farmers who use it can be confident that their crops are gathered efficiently, allowing them to focus on other vital farm tasks.
For farmers looking to improve efficiency, the Dewulf D-7146 is a smart investment. It’s compatible with a wide range of crops, requires simple maintenance, and provides a comfortable cabin for long work hours. This harvester helps make farm work easier and is an invaluable asset for anyone aiming to streamline their harvesting process.

Launch Scan Tools are revolutionizing the way vehicle diagnostics are conducted. Whether you’re a professional mechanic, a DIY enthusiast, or someone managing a repair shop, Launch scan tools can provide fast, reliable, and accurate results. These tools offer a variety of features that help you quickly identify problems in cars and trucks, making repairs more efficient and cost-effective.
With Launch scan tools, you can access a wide range of diagnostic capabilities. From checking engine lights to analyzing deeper issues in various vehicle systems, these tools ensure that you can diagnose problems with precision. The ease of use and broad compatibility of Launch scan tools make them a must-have for anyone looking to improve their automotive troubleshooting skills.
What Are Launch Scan Tools and Why Are They Important?
Launch scan tools are special devices used to diagnose problems in cars and trucks. They connect to a vehicle’s onboard computer system and check for any issues, like a check engine light or a malfunctioning sensor. These tools are useful for both car owners and professionals because they help find problems quickly and accurately, saving both time and money on repairs.
Having a Launch scan tool on hand makes diagnosing vehicle issues easier. Instead of relying on guesswork or expensive mechanic visits, you can get an accurate readout of what’s wrong with your vehicle. This makes it easier to fix problems right away and avoid bigger issues down the road.
Key Features of Launch Scan Tools for Automotive Professionals
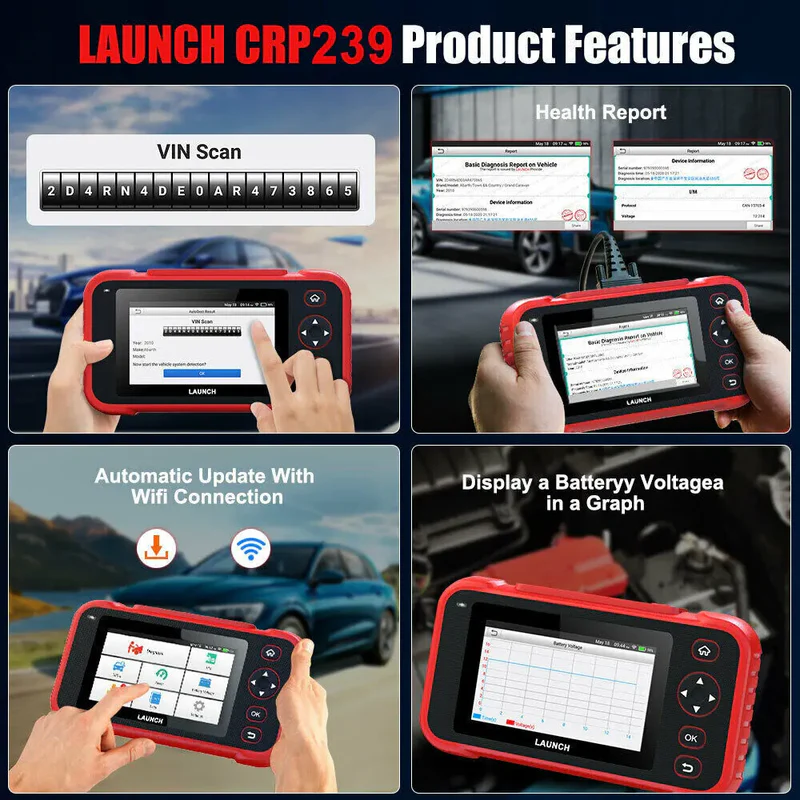
Launch scan tools come with many useful features that make them stand out in the market. They allow automotive professionals to perform a variety of tasks, from reading error codes to resetting service lights. One of the best features is the ability to perform diagnostic tests on many different vehicle brands and models.
Some key features include:
- Wide Vehicle Coverage: These tools can work with many car makes and models, making them ideal for professionals who work with a variety of vehicles.
- Real-Time Data: Launch scan tools show real-time information about a vehicle’s performance, helping to pinpoint issues as they occur.
- Ease of Use: The tools have a user-friendly interface, making them accessible for both beginners and experienced mechanics.
These features make Launch scan tools essential for anyone looking to diagnose and fix vehicle problems effectively.
How Launch Scan Tools Can Help Diagnose Engine Problems
Launch scan tools are especially useful for diagnosing engine problems. The tool connects to the engine control unit (ECU) and retrieves data that helps identify any issues affecting performance. For example, if the engine light comes on, the scan tool can tell you what’s causing the problem, whether it’s an issue with the oxygen sensor or something else.
Using Launch scan tools, you can:
- Quickly identify issues with engine components
- Clear codes after repairs are made
- Check real-time data to understand the health of the engine
This helps mechanics and car owners fix engine issues faster and more accurately, preventing costly repairs from being missed.
Are Launch Scan Tools Compatible with All Vehicle Models?

Launch scan tools are designed to work with a wide range of vehicle models, from standard cars to heavy-duty trucks. They offer excellent compatibility with many makes and models, including popular brands like Ford, Toyota, and BMW. Whether you drive a passenger car or manage a fleet of trucks, Launch scan tools can help you perform diagnostics efficiently.
However, it’s always important to check the specific model of Launch scan tool you are considering to ensure it supports your vehicle. Some tools may have more extensive vehicle coverage than others.
Popular Vehicle Models Supported by Launch Scan Tools:
- Passenger Cars: Compatible with models from major car manufacturers.
- Trucks and Heavy-Duty Vehicles: Some models are designed for commercial and industrial vehicles.
- Electric and Hybrid Vehicles: Newer Launch scan tools can even work with electric or hybrid cars.
This ensures that no matter what type of vehicle you work with, there is a Launch scan tool that can help.
Conclusion:
In conclusion, Launch scan tools are incredibly helpful for diagnosing and fixing vehicle problems. Whether you’re a professional mechanic or a DIY car owner, these tools make it easier to understand what’s wrong with your car. They save time and money by providing accurate information, allowing you to fix issues quickly. Launch scan tools are easy to use and are designed to work with many types of vehicles, making them a great investment for anyone who wants to take better care of their car.
Overall, having a Launch scan tool can make car maintenance simpler and more efficient. With real-time data and wide vehicle compatibility, these tools help you spot problems before they become bigger issues. So, whether you’re looking to save on repair costs or simply want to learn more about how your car works, a Launch scan tool is a smart choice.
FAQs:
Q: What is a Launch scan tool?
A: A Launch scan tool is a device that helps diagnose car problems by connecting to the car’s computer system.
Q: Can Launch scan tools be used on trucks?
A: Yes, many Launch scan tools are designed to work with both cars and heavy-duty trucks.
Q: Are Launch scan tools easy to use?
A: Yes, they have a simple interface that makes them easy for beginners and experts to use.
Q: Can I reset my car’s check engine light with a Launch scan tool?
A: Yes, most Launch scan tools can reset the check engine light after identifying the issue.
Q: How do I choose the right Launch scan tool?
A: Choose a tool based on the types of vehicles you work with and the features you need, like advanced diagnostics or real-time data.
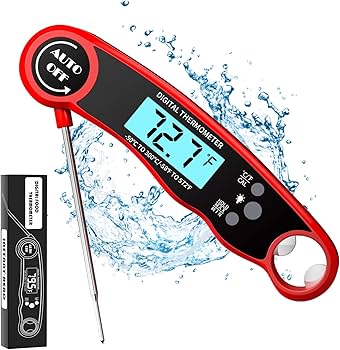
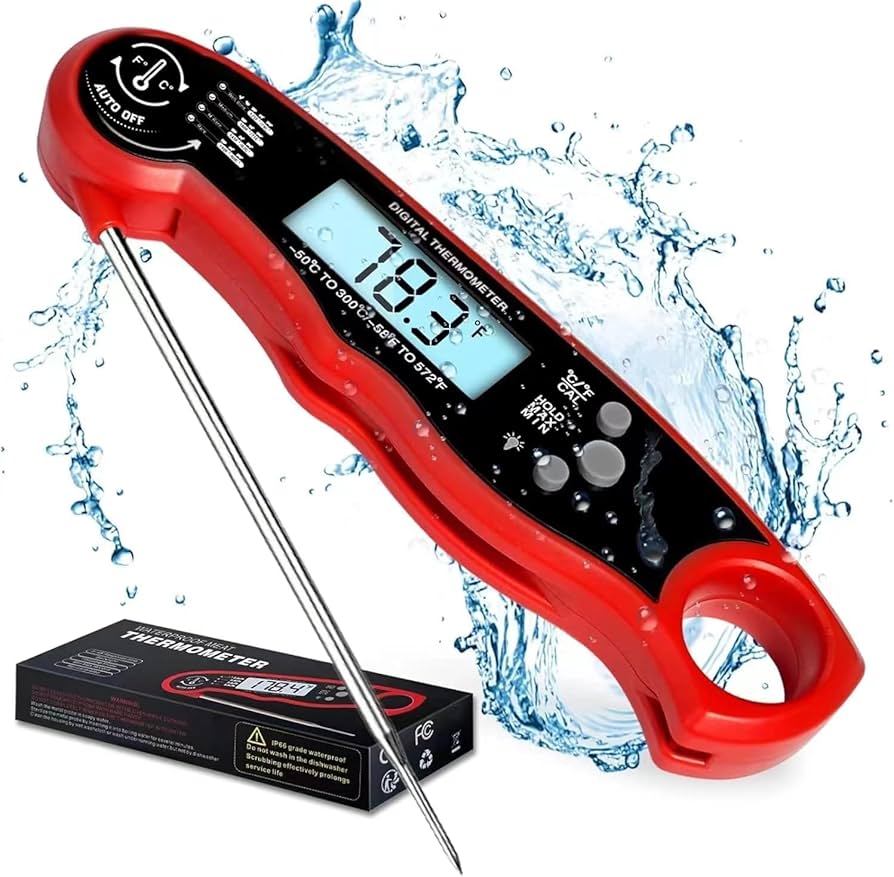
If you’re seeing the “Qisebin Digital Thermometer LLL Error Code,” don’t worry—you’re not alone! This issue is common, and we can help you understand what it means and how to fix it. The “LLL” error usually appears when the thermometer cannot properly measure the temperature. It can be frustrating, but we’ll walk you through the steps to resolve it.
The first thing to know is that the LLL error on your Qisebin thermometer could indicate that the thermometer is not in contact with the skin or is being used in extreme temperatures. There are several simple fixes to get your thermometer working again. Keep reading to find out more!
More Insights on the Qisebin Digital Thermometer LLL Error Code
If you’re dealing with the Qisebin Digital Thermometer LLL error code, understanding why it happens and how to fix it can make all the difference. In this additional section, we’ll dive deeper into more solutions and tips to ensure your thermometer works perfectly every time.
Check for Proper Calibration
Sometimes, the LLL error code could indicate that the thermometer needs recalibration. If your thermometer has been used frequently or has been dropped, it may lose its calibration. While many digital thermometers, including Qisebin models, don’t require manual recalibration, there are some steps you can take to reset or restore its factory settings. Consult the user manual for specific instructions on how to reset the thermometer or contact customer support for assistance.
Use the Thermometer in the Right Environment
Another reason the LLL error appears is using the thermometer in the wrong environment. For example, if you’re using the thermometer in a room that’s too hot, too cold, or near an air conditioner, the device may struggle to get an accurate reading. For the most reliable results, ensure that the thermometer is used at room temperature and avoid any environmental extremes.
Cleaning the Thermometer
Maintaining your Qisebin thermometer by keeping it clean is also essential for ensuring accurate readings and avoiding error codes. Dirt, moisture, or debris on the thermometer’s sensor can interfere with its performance, causing error messages. Clean the thermometer according to the manufacturer’s guidelines. Usually, this involves gently wiping the sensor with a soft cloth and avoiding harsh chemicals or excessive water.
When to Seek Professional Help

If you’ve tried all these fixes and the Qisebin Digital Thermometer LLL error still appears, it might be time to seek professional help. You can contact customer service for troubleshooting or ask about potential repairs. If the thermometer is still under warranty, you may be able to get a replacement or have it fixed at no extra cost.
In most cases, the LLL error is nothing to worry about, and with these extra steps, your thermometer will be up and running again in no time!
Conclusion:
If you see the Qisebin Digital Thermometer LLL Error Code, don’t panic. It’s a common issue, and the fix is often simple. By checking the thermometer’s battery, repositioning it, or ensuring the environment isn’t too hot or cold, you can likely get it working again quickly. Always remember to follow these steps to avoid the error in the future.
In the rare case that the LLL error persists, it could indicate a more serious problem with the thermometer. If that happens, consider contacting customer support or replacing the device. With a little care, your Qisebin thermometer can continue giving you accurate readings for years to come.
FAQs:
Q: What does the LLL error code mean on a Qisebin thermometer?
A: The LLL error usually means that the thermometer is not in contact with the skin or is experiencing extreme temperatures.
Q: How do I fix the LLL error on my Qisebin thermometer?
A: Try checking the battery, repositioning the thermometer, or using it in a more moderate temperature environment.
Q: Is the LLL error a serious problem?
A: No, it’s usually a minor issue that can be fixed by following simple troubleshooting steps.
Q: Can the LLL error be caused by a low battery?
A: Yes, a low battery can cause the thermometer to display the LLL error.
Q: How can I prevent the LLL error from happening again?
A: Make sure the thermometer is placed correctly on the skin and used in a temperature-controlled environment.
Read More: targets-of-internet-blockers
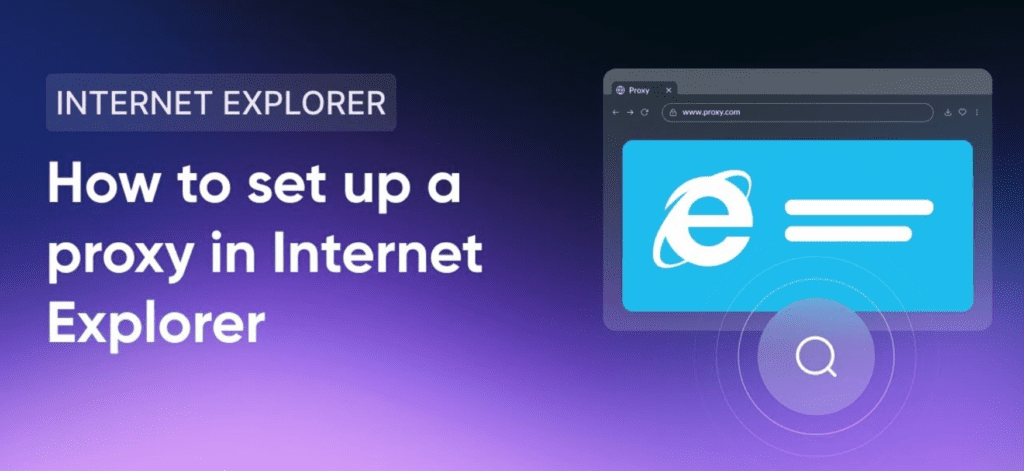
When you are dealing with Internet Explorer proxy settings GPO red green lines, it can be frustrating trying to figure out why your settings are not working correctly. The red and green lines usually appear when there’s a mismatch or an error with how Group Policy Objects (GPO) are set up for the Internet Explorer proxy. This can cause connection problems or prevent web pages from loading properly.
In this post, we’ll guide you through understanding Internet Explorer proxy settings GPO red green lines and how you can resolve them step by step. If you’re new to proxy settings or GPOs, don’t worry! We will break things down in simple terms to help you fix this issue easily.
What Are Internet Explorer Proxy Settings GPO Red Green Lines
When you’re using Internet Explorer proxy settings GPO red green lines, it means there’s an issue with your Group Policy Object (GPO) settings related to the proxy. These red and green lines are visual indicators that show problems or mismatches in your network settings. Red lines usually mean there’s an error, and green lines indicate success. If these lines are showing up, it’s a sign that something isn’t configured correctly in the settings.
These lines are important because they help you identify where problems occur in the GPO setup for Internet Explorer. If the proxy settings are incorrect, it can prevent you from accessing websites or slow down your internet connection. Understanding these red and green lines can help you quickly troubleshoot and fix any issues with your GPO configuration.
Understanding GPO Errors and Their Impact on Internet Explorer Proxy Settings
GPO errors affect how proxy settings work in Internet Explorer. Internet Explorer proxy settings GPO red green lines are often caused by an incorrect policy or setting that prevents your browser from working properly. When there’s a mismatch, the GPO will show either red or green lines to alert you about the issue.
These errors can cause problems like slow internet, failure to load certain web pages, or even a complete loss of internet access in some cases. Fixing these GPO errors is essential to restoring your internet connection and making sure your proxy settings work as expected.
How to Identify the Red Green Lines in Internet Explorer Proxy Settings GPO
Identifying Internet Explorer proxy settings GPO red green lines is easy if you follow these steps:
- Check the Group Policy Object (GPO) editor on your system.
- Look for the visual indicators (red and green lines) next to the proxy settings.
- Red lines typically show a problem, while green lines mean the settings are correct.
When you notice a red line, it’s time to investigate what’s causing the problem. Sometimes, it’s a wrong proxy address, or it might be a conflict with other GPO settings. Fixing these red lines can quickly restore the function of your browser.
Steps to Fix Internet Explorer Proxy Settings GPO Red Green Lines
To fix Internet Explorer proxy settings GPO red green lines, follow these simple steps:
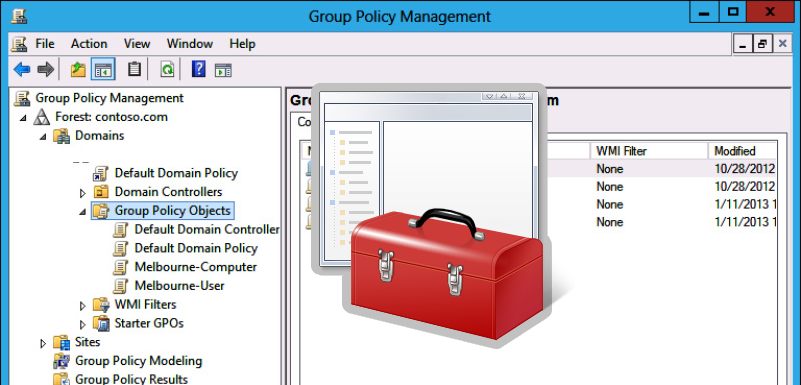
- Open the Group Policy Management Console.
- Navigate to the Internet Explorer settings section.
- Check the proxy settings configured under the User Configuration.
- Correct any mismatches, like an incorrect proxy address or port.
- After making changes, refresh the Group Policy by running gpupdate /force in Command Prompt.
These steps should help you clear up the red and green lines. Always test the settings by restarting Internet Explorer to check if the problem is fixed.
Common Causes of Red and Green Lines in Internet Explorer Proxy Settings
There are several reasons why Internet Explorer proxy settings GPO red green lines may appear. Some common causes include:
- Incorrect proxy server addresses: If the server address in your GPO doesn’t match the actual proxy server, you’ll see red lines.
- Conflicting policies: Sometimes, multiple policies can conflict with each other, leading to errors.
- Outdated settings: If the proxy settings were updated and not properly applied, this can cause issues.
Fixing these problems involves checking the settings for accuracy and updating the policies if needed.
Conclusion
In conclusion, Internet Explorer proxy settings GPO red green lines can be a helpful tool in identifying problems with your proxy settings. When you see these lines, they act as a visual guide to help you understand whether your settings are correct or need adjustments. Fixing these issues is simple if you follow the steps outlined in this guide.
Regular maintenance and updates of your GPO settings will help prevent these problems in the future. By understanding the cause of the red and green lines, you’ll be able to troubleshoot and fix any issues quickly and efficiently.
FAQs
Q: What do the red and green lines in Internet Explorer proxy settings mean?
A: The red and green lines indicate issues with your proxy settings. Red means there’s an error, and green means everything is working fine.
Q: How can I fix the red and green lines in Internet Explorer proxy settings?
A: Fixing the lines involves checking your GPO settings, correcting any mismatches, and updating the proxy settings in the Group Policy Editor.
Q: Why do my Internet Explorer proxy settings not work?
A: If your proxy settings are incorrect or outdated, it may cause errors, such as the red and green lines. Check for proper configuration and update settings as needed.
Q: Can conflicting policies cause red and green lines in proxy settings?
A: Yes, conflicting Group Policy Objects can cause these issues. Ensure all policies are consistent and properly applied.
Q: How can I avoid proxy issues in the future?
A: Regularly update your proxy settings and ensure all GPOs are aligned with the correct configuration to avoid future problems.

Daily Slot Gacor Guide: Best Hours and Providers to Play for Maximum Payouts

The Rise of Gacor77: How This Online Slot Platform Became a Household Name

Why Slot Machines Are the Heart of Modern Casinos

BF Video Game Wiki 2024: Everything You Need to Know

Unlocking the Secrets to Highland Cabinetry Business Earnings

Explore 123Movies Free Online Movie Streaming Sites: Watch Movies Without Paying
-
 Entertainment12 months ago
BF Video Game Wiki 2024: Everything You Need to Know
-
Business10 months ago
Unlocking the Secrets to Highland Cabinetry Business Earnings
-
Entertainment9 months ago
Explore 123Movies Free Online Movie Streaming Sites: Watch Movies Without Paying
-
sports12 months ago
NBA Random Player Generator: Discover New Players and Boost Your Basketball Fun
-
games12 months ago
Unblocked 66 EZ: A Complete Guide to Accessing Free Online Games
-
Tech10 months ago
Unlock Your Freelancing Potential with bc1q53qxhttps://chisel.xyz/kards: Your All-in-One Solution
-
Tech10 months ago
How to Change a Watch Battery: A Simple Guide for Everyone
-
Dital Marketing9 months ago
Exploring https www facebook: Everything You Need to Know